
STILLEN G35 Camber Adjusters & Toe Arms
One of the most popular modifications to a G35 or 350Z is a lowering kit. With a wide array of options from Eibach, Tein, KW, and others… the fortunate owners of these vehicles can set their cars up at virtually any height/stance they desire. One of the down sides to the suspension on the Z33 platform is the lack of alignment adjustment built into the factory suspension. From the factory these cars come with insufficient adjustment capabilities for the front camber as well as little to no adjustment for the rear camber or toe.
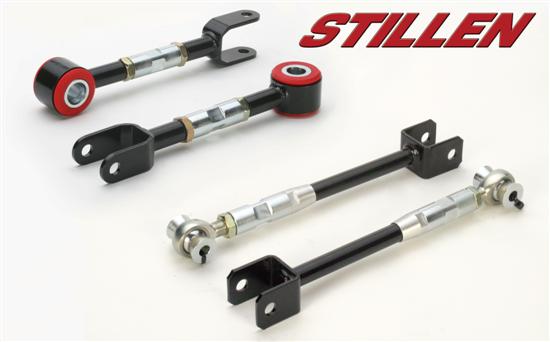
Due to the lack of factory adjustment STILLEN has developed new upper control arms with camber adjustment capabilities, as well as rear camber and toe arms. To show just how easy it is to install these parts three members of the STILLEN marketing team decided to tackle the job on a Saturday in one of their driveways. Josh Biggers (vehicle owner), Mike Ullrich (house/garage owner) and Kyle Millen were able to install everything and make adjustments to the sway bar within 4 hours using regular floor jacks and hand tools. Also, stopping regularly to document the process with photography.
We hope that this little article encourages you to try this type of installation for yourself. Working on your own car can be fun and rewarding, as well as save you money. Having G35 performance parts will enhance your driving experience. Also, you will have a better understanding of exactly what your car is doing while your driving. Suspension is a very important part of the car and if the modifications are not performed properly the results can be dangerous. If you feel that any of this is beyond your capabilities we strongly recommend that you leave this up to a professional.
Throughout this article you will see bright red STILLEN adjustable sway bars. Josh had installed the sway bars prior to the components we were adding on this day. We will go into a little more detail on sway bar settings later.
Step-by-Step Installing the STILLEN G35 Coupe Rear Camber Arms & Toe Arms
Step 1: Getting Started
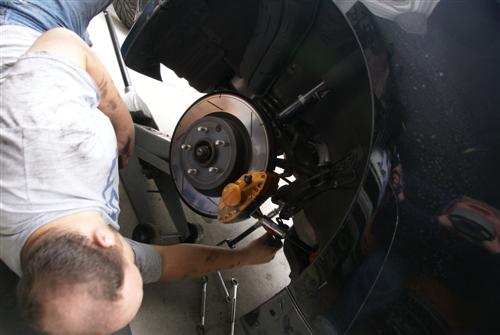
With the rear wheels removed we were able to get a good idea of where to start. It really does not matter if you change the front or rear suspension components first when doing the complete kit. We just started in the rear because we knew that would take the longest. We figured we would knock it out first.
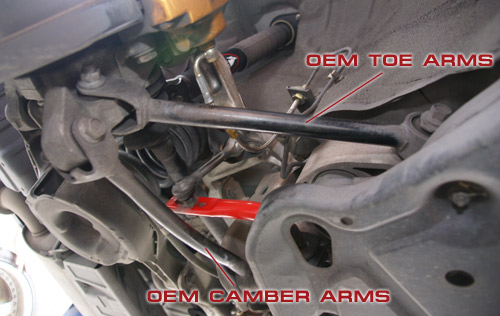
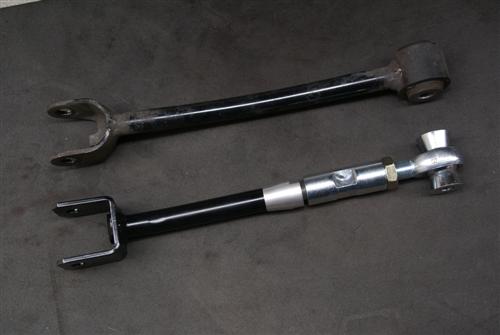
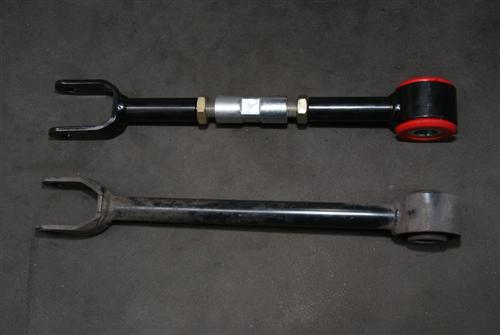
OEM G35 Camber Arm & Toe Arm
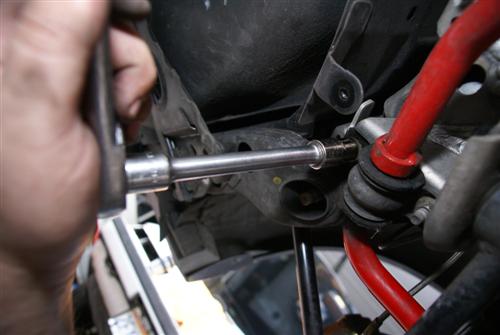
Step 2: Loosen Underbody Panels & Sway Bar Mounts
To aid in removal of the rear camber and toe arms you will need to loosen some of the underbody panels as well as the sway bar mounts. This only takes a few minutes and makes the installation MUCH easier.
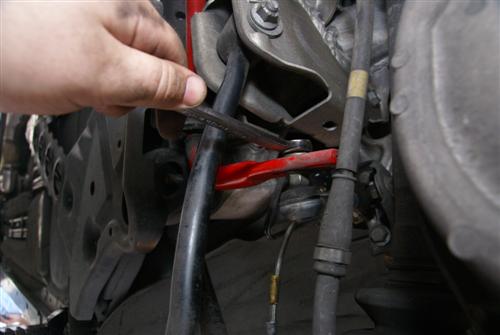
Loosening the Underbody Panels & Sway Bar Mounts
Loosening the Underbody Panels & Sway Bar Mounts
Loosening the Underbody Panels & Sway Bar Mounts
Step 3: Remove the Rear Links & Mark Your Current Camber Eccentric Cams
Once you have all of the surrounding obstructions out of the way you are ready to begin removing the rear links. We recommend marking your current camber eccentric cams so that you have some type of reference when you install your new camber arms. Keep in mind that the factory hardware will be re-used so you will want to make sure that you keep track of it and make sure it is out of danger.
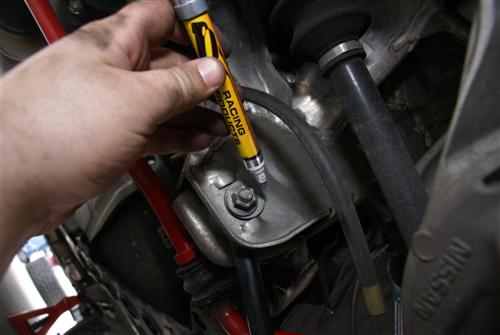
Marking the Current Camber Eccentric Cam Locations
Step 4: Remove the Factory Camber Arms
At this point you can begin removing the factory camber arms. You will want to keep the factory toe arms on the car to support the rear suspension.
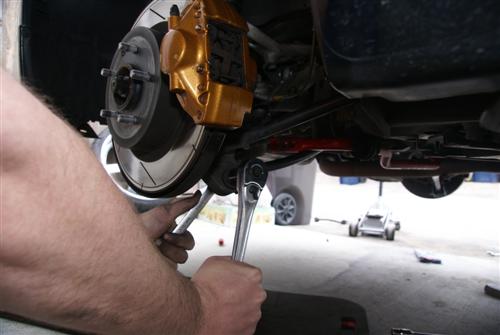
Removing the Factory Camber Arms
Step 5: Remove the Rear Toe Arms
Once you have the rear camber arm removed you can begin removing the rear toe arms. The toe arm bolts go through the chassis and connect to a threaded nut already installed on the backside of the chassis. You will not need to worry about putting a wrench on that nut as the chassis is designed to prevent it from rotating. Simply remove the bolt and pull the toe rod out.
Removing the Rear Toe Arms
Step 6: Align Mounting Holes
One you have the factory components out of the car we recommend lining them up side by side. Try to align the mounting holes on your STILLEN arms in the same position as factory. This way your car will be similar to the way it was before you began the work. This little bit of time spent aligning these holes will make your re-alignment MUCH easier.
Aligning the Mounting Holes
Aligning the Mounting Holes
With the factory and STILLEN camber arms side by side you can clearly see the major improvements in construction as well as alignment capabilities. Utilizing laser cut mounting clevis’ precision welded to CNC machined steel connecting rods and finished off with heim joints and high mis-alignment spacers these camber and toe arms offer incredible strength and a wide range of adjustment. Also, on the toe arms we use a higher quality, poly urethane bushing to replace the O.E. rubber bushings.
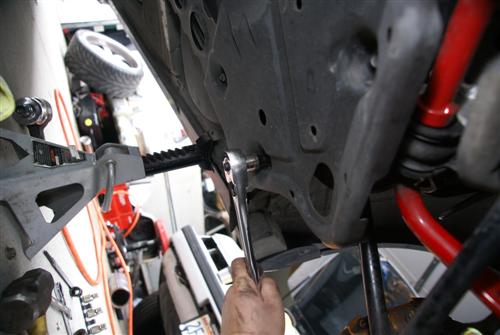
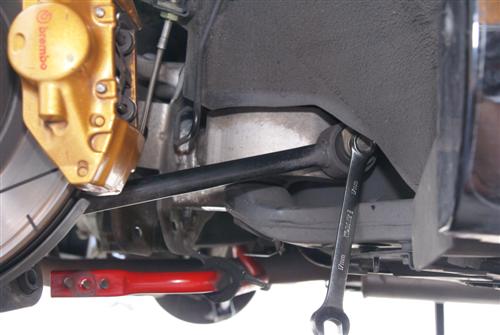
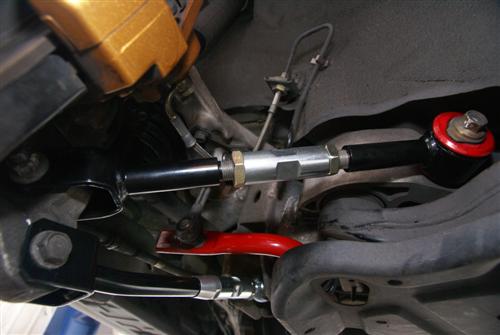
Step 7: Install New STILLEN Suspension Components
Now you can begin installing your new STILLEN suspension components. Our recommendation is to start with the chassis mounts first and then move to the spindles. These mounting points will not move and it is much easier to start with them mounted to the fixed locations first. Also, we recommend starting with the toe arms first, then installing the new camber arms second. Because of the location of these parts it is much easier to start with the toe arms then do the camber arms after.
Installing the New STILLEN Suspension Parts
Step 8: Check Your Witness Line
Once you have finished installing your camber arms you will want to make sure that your witness line on the eccentric camber adjusters is in the same location as factory. Again, this is to help with the re-alignment. Now you are ready to re-attach all of your sway bar mounts and factory under trays. Also, we recommend going around and doing a “nut and bolt check” making sure that all of your hardware is secure.
Step 9: Get Your Alignment Done
At this point you are ready to get an alignment done on your car. Let your technician know that you have aftermarket suspension components installed on your car to allow the car to be properly aligned. With these components installed you will be able to achieve any desired suspension settings.
G35 Coupe With STILLEN Rear Camber Arms & Toe Arms

