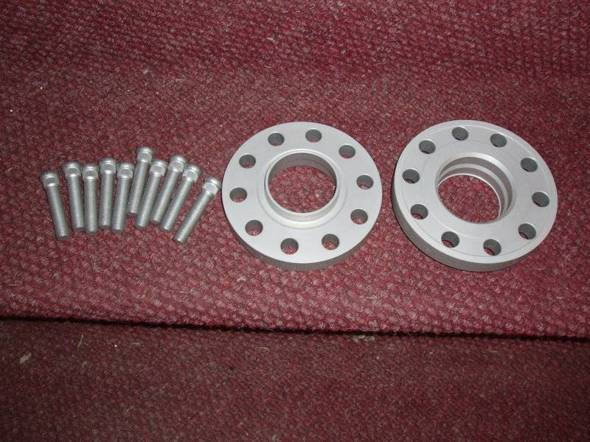
20mm H&R TRAK+ DRS Rear Spacer installation on 2010 Nissan 370Z
Tools Required:
- 21mm deep socket for lug nut removal
- 2 x (12×1.25) open ended lug nut for stud removal and installation
- 19mm open ended wrench to remove brake calipers
- Needlenose pliers
- Wire or cable ties to support brake caliper while installing spacers
- Stack of washers to install studs
- 3lb sledge for easy stud removal
- Jack stands to support vehicle
- Anti-seize compound for back of spacers
Preparation:
Wash vehicle wheels wells and suspension to aid in installation and remove dirt. Remove your spacers from the packaging and check you have all parts.
Installation:
1) Jack up the rear of your vehicle and position the jack stands to support the rear end. Make sure the park brake is NOT set and the vehicle is on a level surface. Block the front wheels from rolling.
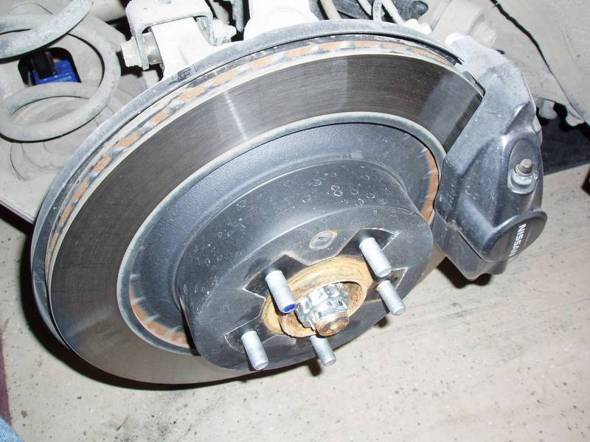
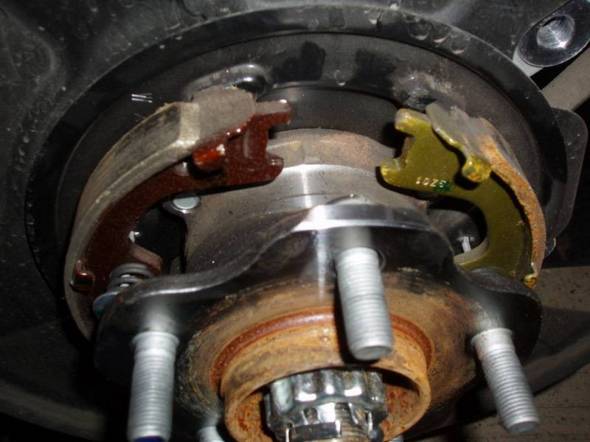
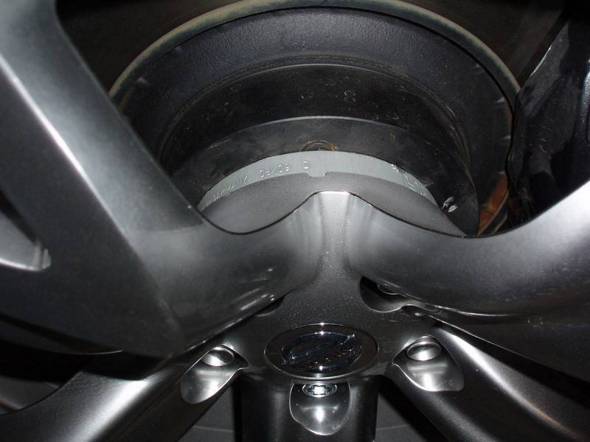
2) Remove the rear wheel. You should see this:
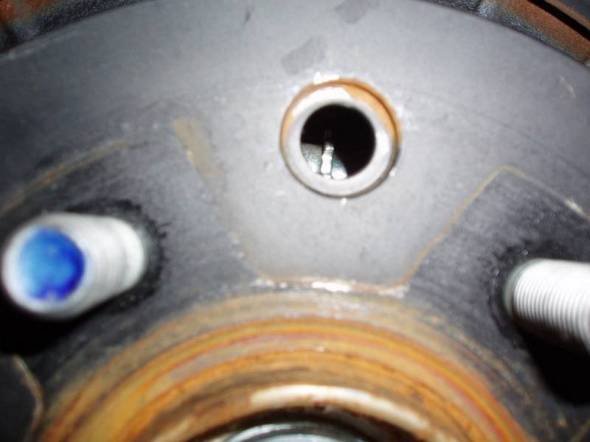
If you have trouble turning the rotor at this point, you may need to open the rubber dust cap on the parking brake adjustment hole and back the star wheel off a few clicks, or until the rotor turns freely. This will allow the rotor to come off easily. Most rotors should not need this adjustment though.
3) Remove the two 19mm bolts securing the caliper to the rotor. If your rotors are not worn, you should be able to slide them off easily. Support the caliper in place with some wire or cable ties so the brake line is not strained.
4) The rotor should now slide off the studs. If it is difficult to move, tap it with a RUBBER mallet to loosen it. It should come off easily.
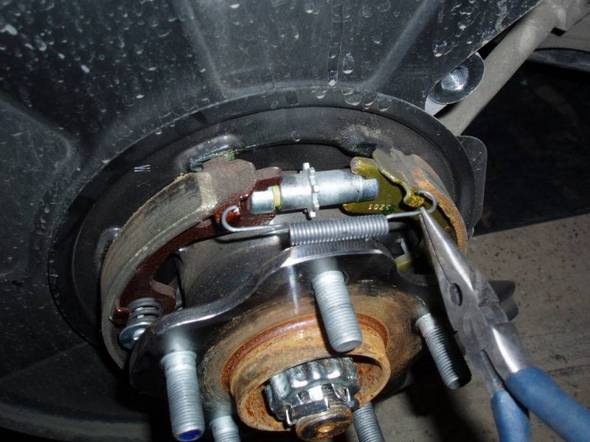
5) You should now see the rear park brake assembly and you will need to remove the tensioning spring with a pair of needlenose pliers.
6) Remove the star wheel spacer carefully, it is a two piece unit and place it on the ground in the same orientation as it will go back in.
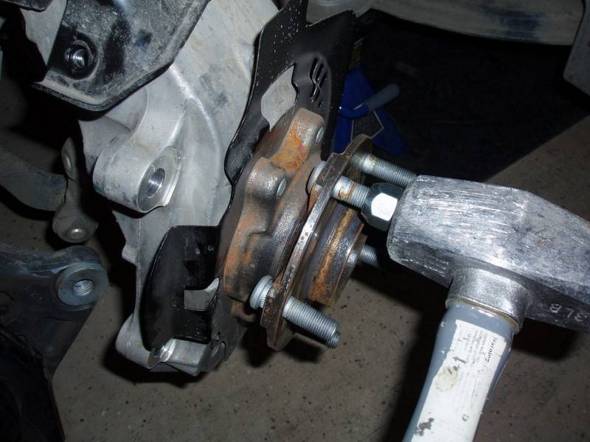
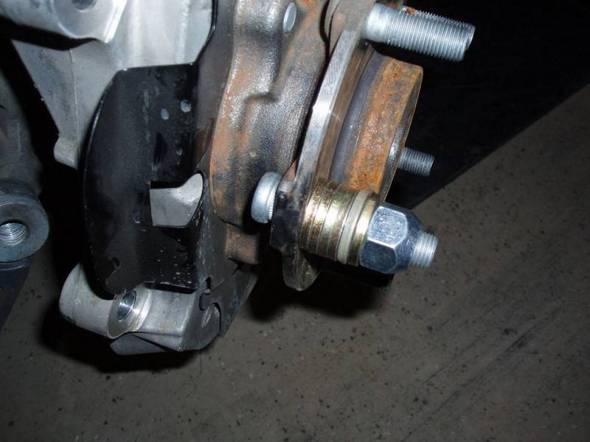
7) Thread one of the open ended lug nuts onto a stud and tap lightly with the mallet. It should pop out easily. Rotate the hub to allow the stud to be removed. (Note: the following picture is from the front assembly but is the same idea!)
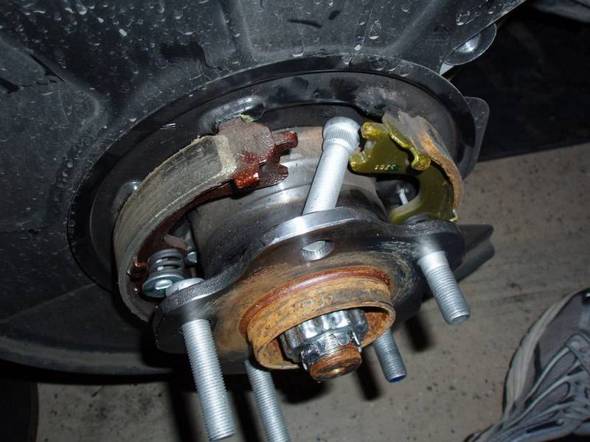
8) Insert the new stud from behind the hub and at a slight angle.
Do one stud at a time to avoid them catching on the brake shoes as the hub spins around.
9) After the stud is through, slide the washers over the new stud and place an open ended lug nut onto the new stud (again the picture is from the front install, but is the same idea)
10) Tighten the new stud into place. Be careful to follow the manufacturers torquing specifications.
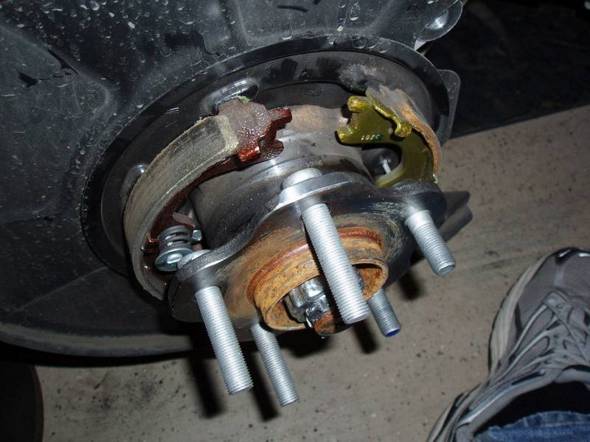
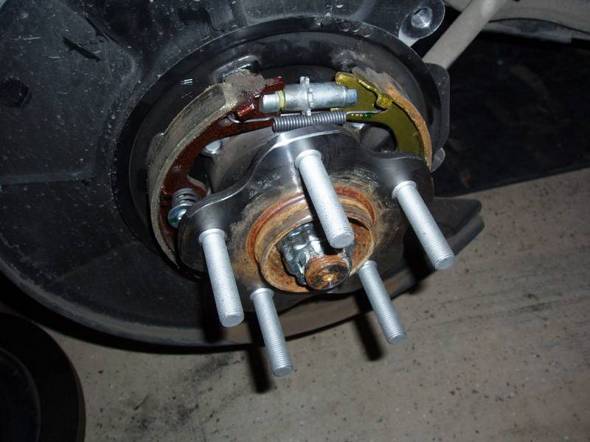
11) Replace the star wheel assembly and the tensioning spring. The finished hub should look like this when all the studs are in and tightened.
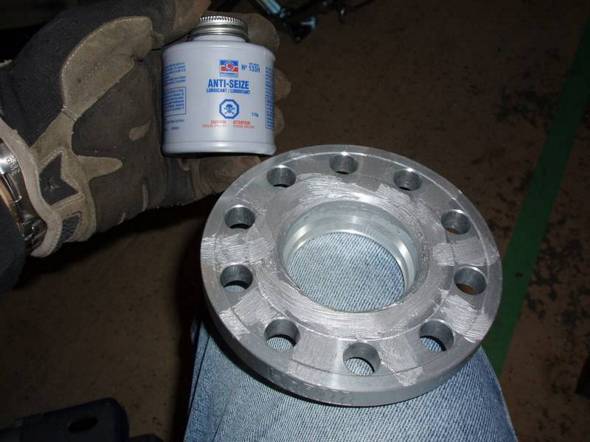
12) Remount the rotor and lubricate the rear of the spacer with anti-seize compound. Tighten down the spacer and rotor with a couple of washers and the open ended lug nuts.
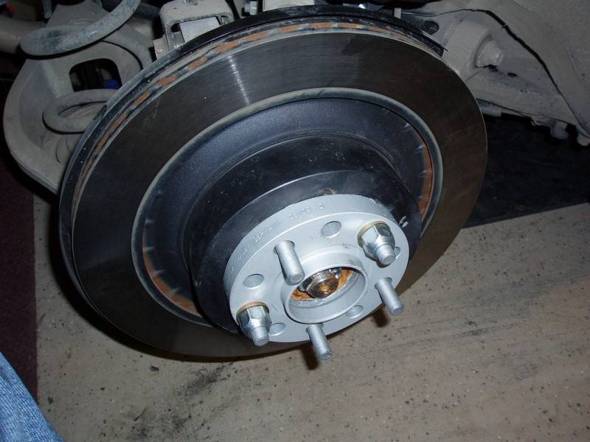
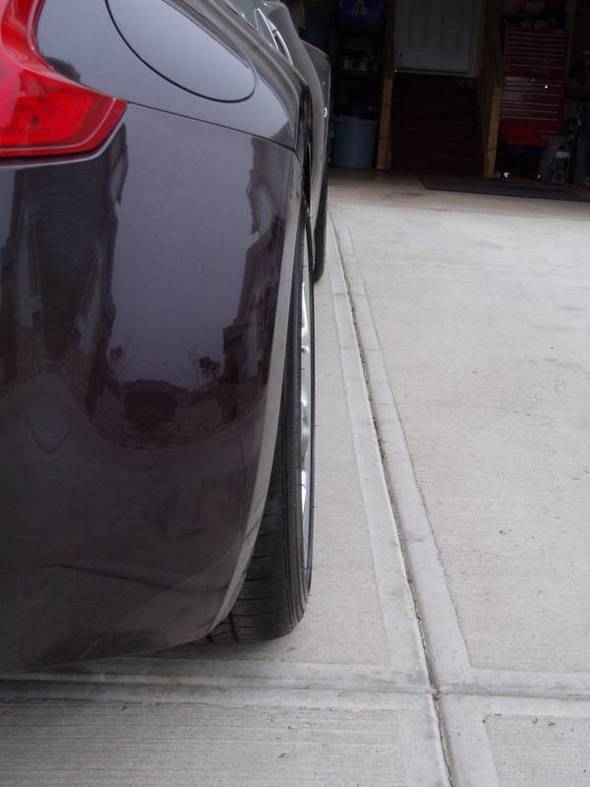
13) Remount the brake caliper in the reverse sequence as disassembly and remove the open ended lug nuts and washers. Remount the wheel and torque wheels to manufacturers specs. You are now done! Repeat procedure for the other side of the car. Your finished wheel should look like this:
Congratulations on installing your 20mm rear spacers!
Finished car should look like this for clearance (non-lowered suspension):
This DIY article was provided by STILLEN customer Mark Lewis of Edmonton, Alberta, Canada.

