Monthly Archives: February 2009

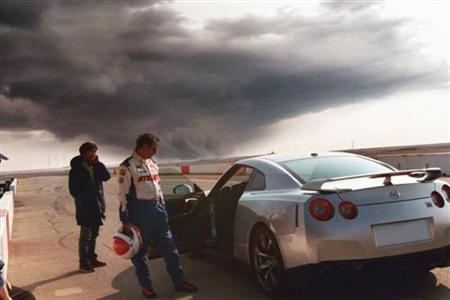
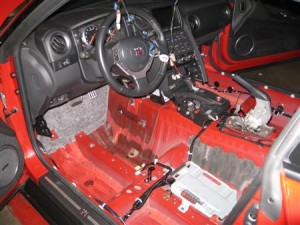
One of the first stages of gutting a race car is to check your starting weights. We loaded it with a full tank of gas to see how much the car weighed, and well, as expected the R35 GT-R is no Georges St. Pierre. Godzilla is a very fitting name for this car as it weighed in at a whopping 3,900 pounds full of fuel.

Gutting the Nissan R35 GT-R for the Targa Rally

Gutting the Nissan R35 GT-R for the Targa Rally

When building a race car the ultimate goal is to achieve the best power to weight ratio possible. Over the next few days we will be stripping our R35 GT-R down and weighing all of the components that come out of it. We will be weighing the doors, fenders, hood, trunk and everything else to see what we can do to lighten up those parts of the car as well.

Here are some early pictures of the tear-down. We have completely stripped the inside of the car now except the dashboard and doors. All of the panels are out and there are more plans of further parts removal coming.

60 lb seat removed from the STILLEN R35 GT-R

60 lb seat removed from the STILLEN R35 GT-R

You would not believe the how heavy some of these parts are. It is incredible! The passenger seat weighs 60 POUNDS!!!! It’s not too surprising considering how many motors and air bags are inside them. We’re going to be replacing that with a light weight, carbon fiber seat that only weighs 15 pounds…Nearly a 100 pound weight savings just by changing seats.

Here’s some photos of the current state of the R35 GT-R:

We’ll continue to prepare the R35 GT-R for the Targa Newfoundland tarmac rally, and invite you to follow along.

We’re enthusiasts here at STILLEN, just like yourself. Whenever possible we like to get our hands dirty, especially when it gives us the opportunity to install some STILLEN products and get a real-world feel for them – just like you our customer will experience.

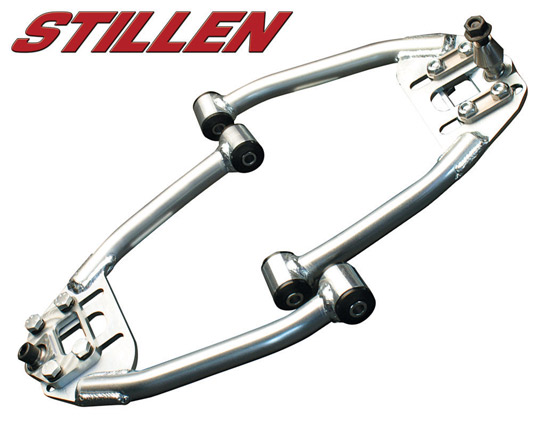
G35 Coupe Camber Kit

G35 Coupe Camber Kit


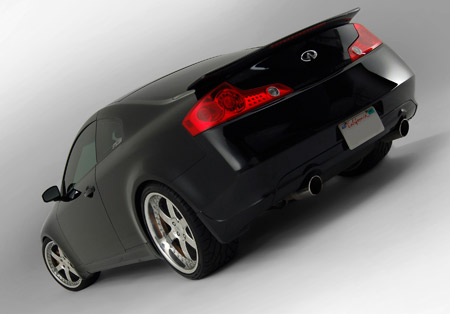
I drive a 2004 G35 Coupe, and after upgrading to 20″ wheels and installing an Eibach Pro-Kit and STILLEN Sway Bars, the resulting issue with camber on the front and rear was evident immediately, and I quickly realized that despite the fresh new rubber smell of the BFGoodrich’s I had just installed, these tires would be short-lived if I didn’t look for a camber solution ASAP.

That solution, thankfully, was a couple hundred feet away from my desk here at STILLEN, where we manufacture and assemble a full front and rear camber adjustment kit designed specifically to improve upon what Nissan left out, the ability to adjust camber in both the front upper control arm, or the solid camber and toe arms in the rear.

We documented the driveway install of these pieces, so others could get a feel for what went into the install.  Thankfully I was able to bribe Kyle and Mike here in the office with ‘refreshments’ for the use of Mike’s driveway (alley?) and his impossibly robust set of tools (did you need a Razor-Blade-On-A-Stick™ to remove some window decals, yea he’s got one of those..), and both of their wrenching skills to tackle this job.

I’m happy to report that when all was said and done, alignment shop visited, the BFGoodrich’s were planted to the pavement as they should be, and tire wear is extremely even, with no signs of feathering.

STILLEN Infiniti G35

STILLEN Infiniti G35

Hit the DIY Articles section of the STILLEN Blog to see the detailed installation articles, also listed below:

Our goal is to continue with these detailed installation articles, if you’d like to see something in particular, feel free to let us know.

STILLEN is announcing plans to compete in the 2009 Targa Newfoundland Competition Tarmac Rally being held from September 12-19, 2009.  This is a 6-day 1,400 mile paved road rally through the winding roads of Newfoundland.


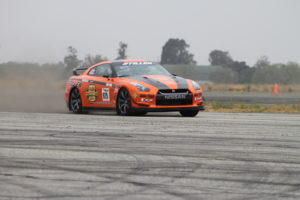
With Targa Newfoundland fast approaching, STILLEN has begun preparation on the 2009 Nissan R35 GT-R rally car. For the past 7 years Steve Millen has made the annual trip to New Zealand to compete in the Dunlop Targa Rally with a Ford vehicle.

Steve Millen Preparing for the 2009 Targa Rally

Steve Millen Preparing for the 2009 Targa Rally

2009 marks the first time in 14 years that Steve Millen and Nissan will head back to the races together. With multiple world championships, race wins, and world records together this will be a tough team to beat.

The car is being prepared at here at STILLEN in Costa Mesa, CA. To prepare for the rally we have a long list of modifications to make. Some of these modifications are to be kept top secret, others are very exciting and we just can’t contain ourselves. Some of the modifications will be:

Lightening – We will be removing as much weight as possible from the car. This will include, lighter racing seats, light weight dry carbon fiber body panels, and more.

Performance – With a long list of performance parts including but not limited to performance exhaust, intercoolers, tuning, and more we hope to gain A LOT more power from this already impressive car.

Braking – This one is kind of top secret but still noteworthy. Let’s just say that AP Racing and STILLEN are working on something very special that will blow a lot of people away.

Suspension – The corners of the car will be shrouded in secrecy but we have plans for shock upgrades as well as adjustable sway bars.

Follow along the build as Team STILLEN develops their Nissan GT-R in to a full fledged tarmac rally race car.

EDIT:  Work has begun to gut the R35 GT-R – See here for photos and info

STILLEN GT-R Gutted

STILLEN R35 GT-R Gutted

0

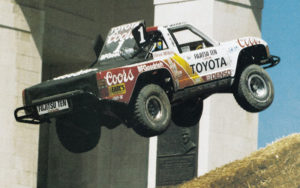
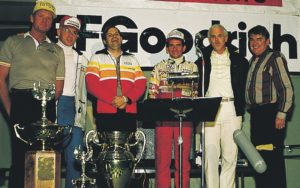
STILLEN Company founder Steve Millen has been globally racing at the professional level for over 30 years. Formula Fords in Singapore, Rally Cars in Africa, Trucks in football stadiums and Nissan Prototypes at LeMans and the 24 Hours of Daytona are just some of Steve’s victory credits. Steve captured the prestigious title of IMSA GT Driver’s Championship in both 1992 and 1994 driving his Cunningham Racing prepared Nissan 300ZX Twin Turbo racecar. His lengthy list of wins has earned him a new title that may remain intact for decades to come…
“The All-Time Winningest Driver in IMSA GT History.”

This legacy of racing experience has led the way in every aspect of the STILLEN business. A fundamental part of success in racing rests in the ability to continually refine performance by a program of modification and testing. Throughout the years, this has been Steve Millen’s forte. He is sought out for testing by such magazines as Road & Track where you will often see his name or byline when they are testing the most powerful and exotic sports cars in the world. For STILLEN, this means that we build and sell parts that work. We also constantly refine existing parts. It’s this type of professional product evaluation in real-world driving situations that give STILLEN a distinct advantage. Automotive journalists at magazines such as Car & Driver, Road & Track, Motor Trend, Automobile, AutoWeek, Turbo, and Sport Compact Car have reviewed and tested many of our products and project vehicles, and provided us with rave reviews.

RACING TIMELINE

1969
  • Began racing career in Hillman New Zealand
1970
  • Continued racing Commer Cob in hillclimbs and rallies
1971
  • Began national racing career in Mark II Jaguar sedan

Jaguar Mk II (1971) Sedan Steve Millen Racing Heritage


1972
  • Raced BMW sedan and Elden Formula Ford – Began international racing career

BMW 2002 (1972) Steve Millen Racing Heritage


1973
  • Won five rounds of New Zealand Formula Ford Championship
  • Won Singapore Grand Prix, Formula Ford class
  • Competed in the New Zealand Heatway Internaional Rally

1974
  • 1st South Pacific Saloon Car Championship

1975
  • 1st in under 2 litre Peter Stuyvesant Series
  • 2nd New Zealand International Rally

1976
  • 1st in class, Benson & Hedges 500 Mile race in Triumph 2500 P.I.
  • 2nd Cibie Rally
1977
  • 1st South East Asian Grand Prix drivers Championship
  • 1st Baypark International
  • 1st Penang Grand Prix
  • 2nd Macau Grand Prix
  • 2nd in class, Benson & Hedges 500 Mile race

1978
  • 1st Baypark International – Chevron B42
  • 1st Selangor Grand Prix, Malaysia – Chevron B42

1979
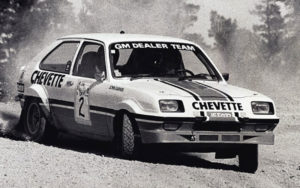
  • Professional driver for General Motors Dealer Team
    Chevrolet Chevette Steve Millen Rally
  • 1st New Zealand Rally Sprint Championship
  • 1st Pukekohe Gold Star Championship Round
  • 2nd Rotorua New Zealand Rally Championship

1980
  • 1st New Zealand International Grand Prix – Ralt RT1
  • 1st Malaysian Grand Prix – set new lap record – Ralt RT1
  • 1st Penang Grand Prix – set new lap record – Ralt RT1

1981
  • 1st in four New Zealand International Series events
  • 1st in Heat Two, New Zealand International Grand Prix – set new lap record, 2nd overall

1982
  • 2nd in New Zealand International Grand Prix – 2nd in heat 1, 1st in heat 2
  • 1st in Riverside Memorial Day Formula Atlantic Race, set new lap record – Ralt RT1
  • 2nd Arizona Pro Rally – highest placing for production rally car in U.S. history- Nissan 200SX
  • 4th Long Beach Grand Prix Formula Atlantic Race – Ralt RT1

1983
  • Joined Toyota Factory Off-Road Team – wins at Pomona & Dallas
  • 1st East of Indio Divisional Pro Rally
  • 1st Tour de Forest Pro Rally
  • 2nd Riverside Off- Road World Championship – Class 7
  • 2nd overall Manufacturers Cup Challenge for Mini Trucks – Toyota Factory Team
  • 1st Manufacturers Trophy Championship for Toyota Factory Team – M.T.E.G

1984
  • 1st Mickey Thompson Stadium Events – Phoenix & Silverdome (Detroit)
  • 1st Manufacturers Trophy Championship
  • 3rd Long Beach Grand Prix Super Vee Race
  • 1st Mears Gang Off Road Race
  • 2nd Off-Road World Championship at Riverside, California
  • 2nd Off-Road Manufacturers Cup Challenge
  • 1st East of Indio Pro Rally
  • 3rd Norwester Pro Rally, Washington
  • 3rd Michigan International Pro Rally
  • 3rd Mid Ohio 24 Hour Race – Porsche 944
  • Raced at Daytona 24 Hour & Sebring12 Hour Races
  • 1st Riverside Enduro – Open Wheel

1985
  • 1st Mickey Thompson Manufacturers Trophy Championship for Toyota
  • 1st San Bernadino Off-Road Race
  • 2nd in both Pomona Off-Road race
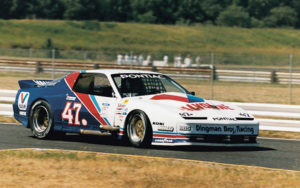
  • 1st in Pontiac Firebird GTO in Columbus 500 to earn Norelco Driver’s Cup
    Pontiac Firebird 1985 GTO Steve Millen Racing Heritage (1)
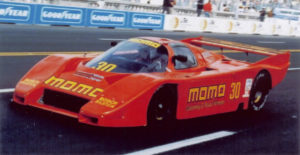
  • Drove IMSA GTP for Momo Team at Sears Point & Columbus 500 events
    ALBA AR5 Ford Cosworth 30 Car Steve Millen Racing Heritage (3)
  • Prepared & drove production based Corvette in “Playboy” Endurance Championship

1986
  • Mickey Thompson Off-Road Grand Prix Grand National Sports Truck Champion – with wins at Hoosierdome ( Indianapolis), San Bernardino (California), Silverdome (Detroit), Houston (Texas).
  • 1st Manufacturers Trophy Championship for Toyota
  • Voted to First Team AARWBA All-American Team
  • Won two Indy Lights races including the inaugural event at Phoenix & Mid-Ohio
  • Started from front row at Meadowlands ( New Jersey ) ARS (American Racing Series) race
  • Was leading the Indy Lights Series at mid-season when team owner, Jim Trueman died, disolving the team.
  • Drove for Toyota Team Europe in World Championship Rally events in Washington & Africa

1987
  • Invited to compete in the prestigious toyota Pro Celebrity race at Long Beach
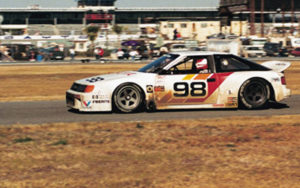
  • 2nd at Daytona 24 Hour Race with Dan Gurney’s Factory Toyota Team – Celica GTO
    Toyota Celica Turbo AAR 1987-88 98 Car Steve Millen Racing Heritage (2)
  • Competed in ARS ( American Racing Series) Championship
  • 1st Manufacturers Trophy Championship

1988
  • 1st Rosebowl Truck Race
    Toyota Stadium Truck Steve Millen Racing Heritage (4)
  • Mickey Thompson Off-Road Grand Prix Grand National Sports Truck Champion
    Toyota Stadium Truck Steve Millen Racing Heritage (2)
  • 1st Manufacturers Trophy Championship
  • Raced at Daytona 24 Hour event with Dan Gurney’s IMSA GTO Toyota Team
    Toyota Celica Turbo AAR 1987-88 98 Car Steve Millen Racing Heritage (1)

1989
  • Joined Nissan with inaugural IMSA GTO Team driving 300ZX
  • 1st – Road America Raceway (Elkhart Lake, WI) – IMSA GTO
  • Competed in IMSA GTO Series for Factory Nissan Team – 13 Races including four 3rd place finishes, one pole and one win
  • Qualifying lap records at Topeka, Kansas and Road America Raceway (Elkhart Lake, WI)
  • 1st – Truck Division at the Pikes Peak Hill Climb with a time of 13:30:13
  • Pikes Peak Hill Climb “Rookie of the Year”

1990
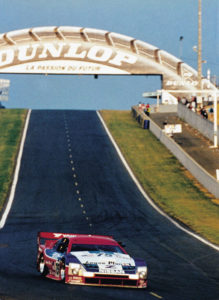
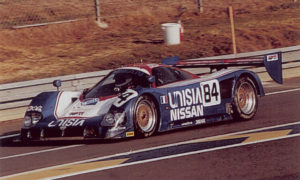
  • 24 Hours of Le Mans Rookie of the Year & 17th overall Piloting Nissan R90CK Prototype – captured lap record at 3:40:03 at 138.208 mph average
    Nissan R90CK Lola Unisia Nissan 84 Car Steve Millen Racing (3)
  • Won three GTS races – Miami, Mosport, Elkhart Lake
  • Record qualifying laps, Mosport & Lime Rock
  • Captured five GTS pole positions – Miami, Mosport, Portland, Lime Rock, Del Mar

1991
  • Earned seven poles in Exxon GTS Series – Sebring, Miami, Mosport, New Orleans, Portland, Road America, Watkins Glen
  • Scored four wins in Exxon GTS Series – Long Beach Road America, Watkins Glen, Lime Rock
  • Record race laps at Road Atlanta & Lime Rock
  • Raced at Bathurst 1000 in Australia for the Allan Moffat Team with co-driver Gary Brabham
  • Cover of Road & Track magazine with Nissan 300ZX GTZ street car tuned by STILLEN

1992
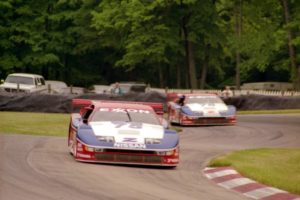
  • Crowned IMSA Exxon Supreme GTS Drivers Champion
  • Earned four poles in Exxon GTS Series – Daytona, Miami, Laguna Seca, Road America
  • Scored four wins in Exxon GTS Series – Miami, Mid Ohio, New Orleans, Lime Rock
  • Record qualifying laps at Miami & Road America
  • Record race laps at Miami, Mosport, Mid Ohio & Portland
  • 1st GTS Manufacturers Championship for Nissan
  • Won 2 IMSA races at Fuji Speedway, Japan

1993
  • 1st Sebring 12 HourRace achieving 15th career GTS win
  • Record qualifying lap at Miami
  • Finished second at Miami, third at Daytona & fifth at Mid-Ohio before being sidlined for the remainder of the season due to serious injuries sustained at Watkins Glen on June 26th

1994
  • Exxon Supreme Series GTS Drivers Champion
    Nissan 300ZX TT IMSA 75 Race Car STEVE MILLEN 1ST PLACE
  • Led Nissan to Exxon Series GTS Manufacturers Championship
  • Scored four wins including two solo wins at Road Atlanta & Portland
  • 1st 24 Hours of Daytona
  • 1st 12 Hours of Sebring
  • 1st in class at 24 Hours of Le Mans, 5th overall
  • Earned Pole Positions at Daytona, Sebring & Portland
  • Record race laps at Atlanta & Mosport
  • Voted to First Team AARWBA All-American Team
  • 2nd at IMSA Race in Autopolis, Japan

1995 Most pole positions in IMSA GTS history with 23 poles
Winningest driver in IMSA GTS history with 20 career wins

  • Debuted new V8 Engine in GTS 300ZX car at Daytona
    Nissan 300ZX TT 75 Car Steve Millen Racing Heritage (8)
  • 1st 12 Hours of Sebring
  • Invited to compete in the prestigious International Race of Champions (IROC) Series – raced at Daytona, Darlington & Talladega Super Speedways – missed Michigan event due to Road Atlanta accident
    IROC 1996 Steve Millen Racing Heritage
  • Led New Zealand TranZam Street Skills Series until returning to U. S.
  • A career-ending accident occurred April 30th, while running 2nd at Road Atlanta & leading the GTS Championship

1996
  • Retired from professional racing

1997
  • Raced the historic winning Ralt RT1 and a Frizbee Can Am car in the VARA Historic Race held in Tustin, California, capturing first in all races
  • Competed with Ralt RT1 in the Downtown Los Angeles Historic Race, finishing 1st

1998
  • Competed with a STILLEN prepared production 300ZX in the Tijuana, Mexico Grand Prix, finishing first
1999
  • Focused efforts to move remaining outsourced performance parts production in-house at STILLEN to control costs and product quality
2000
  • Raced historic Ralt RT1 and Frizbee Can Am Car in annual VARA Historic race held in Tustin California, winning all races
2001
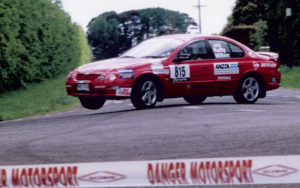
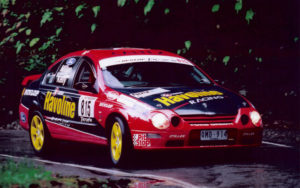
  • Competed in the New Zealand Targa Rally for Ford in a Falcon, finishing 8th out of 180 competitors

Ford Falcon Steve Millen Racing Heritage (1)

  • Nissan shipped Steve’s historic #75 IMSA GTS 300ZX to Japan to be part of the Nissan anniversary, driven by Steve at the Fuji curcuit during fesivities


2002
  • Competed in the New Zealand Targa Rally in a Ford Falcon, finishing in top 10
2003
  • Raced the winning Ralt RT1 at the HSR West Historic Race on the road Course in Fontana California, finishing 1st
  • Competed in the New Zealand Targa Rally in a Turbo 6 Ford Falcon, finishing 6th overall
    Ford Falcon Steve Millen Racing Heritage (2)
2004
  • Competed in the New Zealand Targa Rally in a Turbo 6 Ford Falcon.
  • Raced the #75 IMSA GTS 300ZX car and the famous Ralt RT1 in the HSR West Historic Race Meeting in Fontana California, finishing 1st in the Ralt. 300ZX DNF due to engine fire
    Nissan 300ZX TT 75 Race Car Steve Millen On Track (1)
2005
  • Competed in annual New Zealand Targa Rally with New Ford Focus with modified Turbo 6 Falcon motor. Very Fast car plauged by New Car /First Race mechanical issues – DNF.

2006
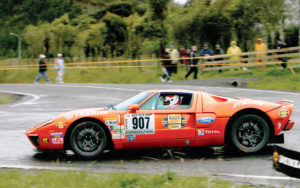
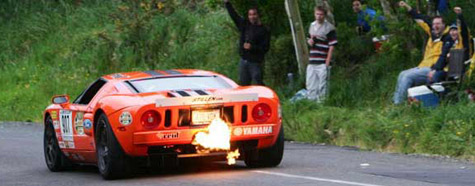
  • Competed in annual New Zealand Targa Rally in New STILLEN Ford GT with many STILLEN upgrades. Extremely Fast car, held back by inclement weather and high horsepower without the advantage of all-wheel drive. An unfortunate mathematical navigation mistake set the team back 3 minutes and locked them out of the Top 10 – 3rd Place in class, 14th overall.
    Ford GT Targa NZ 2008 Steve Millen Racing Heritage (3)

2007
  • Road and Track magazine test 0-200 MPH in the standing mile.

2008
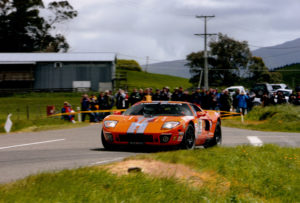
  • GT Targa New Zealand…8th place overall, first father son team, first V8, first Ford.
    Ford GT Targa NZ 2008 Steve Millen Racing Heritage (5)
  • Nissan North America’s exclusive driver for the media and dealer release of the Nissan GT-R.
    IMG_3914
  • Road and Track magazine driver for GT-R, Corvette, 911 test.
  • Road and Track magazine driver for Top 8 affordable supercar challenge.

STILLEN Front Camber Adjustable Upper Control Arm Installation


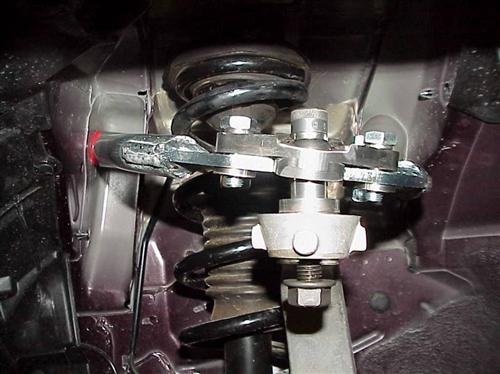
From the factory there is no way to adjust the camber on the front suspension of the Z33 platform.  Because of this, lowering your G35 or 350Z will cause a negative camber situation that will cause the inside of the tire to wear more rapidly than the outside.  This will not only affect your tire wear but also decrease your handling.  By installing STILLEN upper control arms you are able to bring your alignment back into factory spec after lowering your vehicle. Be sure to take a look at all the G35 performance parts we have available to make your driving experience the best it could possibly be.

Step 1: Once you have your car lifted and supported on jack stands you will want to remove the 6 bolts and 2 nuts securing the strut.

Step 2: Next you will want to disconnect the front sway bar.  We recommend disconnecting the sway bar from the lower control arm.  This will allow the suspension to reach its full travel and not be limited by the sway bar.  You will want to leave the end link connected to the sway bar to eliminate any chance of misplacing it.


Step 3: Disconnect the upper control arm from the spindle.  To do this you will need to remove the cotter pin and keep in mind that this will take some muscle to remove this nut.  Do not worry about damaging the cotter pin as it will not be re-used…Just get it out of there.  Some cars will require a little more effort to separate the upper control arm from the spindle.  Also, keep in mind that the upper control is keeping the spindle in its current position.  Once you disconnect the upper control arm the spindle will move…Keep your chin high and head back.  The spindle won’t move far, but you do not want to be right on top of it.


Step 4: With the upper control arm and spindle disconnected you will now need to get the shocks out of the car.  If you followed Step 1 and loosened all of the mounting bolts, this will not be a problem.  To remove the shock we recommend pushing down lightly on the top of the spindle and reaching the lowest point of travel.  It will help to have an extra set of hands at this point to remove the shock.


Step 5: Now that you have gained access to the upper control arm mounting bolts go ahead and unbolt the upper arms.  You will notice that the upper control arm is still in the air even though it has been disconnected from the spindle.  That is because the factory bushings are under tension.  As you loosen those mounting bolts the bushings will free up and the arm will fall down.  Keep this in mind so the control arm does not fall on YOUR arms.


Step 6: With the upper control arms removed from the car grab one of your new STILLEN upper control arms.  You will want to make sure you have the correct arm (passenger side or drivers side.)  To do so, place the factory control arm on top of the new STILLEN arm.  This way you can see the location of the chassis mounts and ball joints.  Make sure you have the correct control arm and prepare it for installation on the car.  To prepare it for installation do your best to set the uni-ball location on the STILLEN control arm to the same location as the ball joint on the factory arm.  This will help you when you go to align your car.


Step 7: Once you have pre-set the STILLEN upper control arm go ahead and install it on the car.  These bolt holes are pre-threaded so you only need to get the bolt started and begin tightening.  Keep in mind that just like the factory bushings, the STILLEN bushings will be under tension as well and the upper control arm will reach a point where it does not want to travel very much.  With this in mind we recommend holding the upper control arm up (parallel to its mounting points on the chassis.)


Step 8: Re-install the shocks back into their mounting locations.  Just like when you took these out of the car, it is helpful to have an extra set of hands to re-install them.

Step 9: Stick the bolt/uni-ball through the top of the spindle and tighten down the supplied nut.  Don’t worry about getting the cone all the way into the corresponding socket on the spindle before tightening.  As you tighten the nut it will draw the spindle and upper control arm together.


Step 10: Return to the engine bay and tighten the 6 bolts and 2 nuts you removed at the beginning of the process.

Remember that many suspension components require special torque settings on the fastening hardware.  We recommend following the instructions and owner’s manual to determine your torque specifications.

Now you have finished the installation of your STILLEN suspension components.  The first thing you will need to do is take the car to an alignment shop.  No matter how good the alignment looks or feels it will need to be adjusted.  We recommend having the alignment done on a 4 wheel laser alignment machine.

STILLEN G35 Camber Adjusters & Toe Arms

STILLEN G35 Camber Adjusters & Toe Arms

One of the most popular modifications to a G35 or 350Z is a lowering kit. With a wide array of options from Eibach, Tein, KW, and others… the fortunate owners of these vehicles can set their cars up at virtually any height/stance they desire. One of the down sides to the suspension on the Z33 platform is the lack of alignment adjustment built into the factory suspension. From the factory these cars come with insufficient adjustment capabilities for the front camber as well as little to no adjustment for the rear camber or toe.

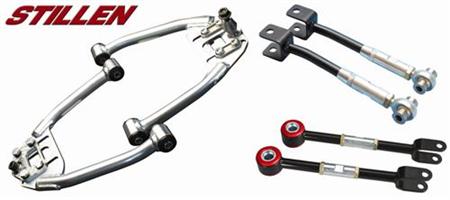
Due to the lack of factory adjustment STILLEN has developed new upper control arms with camber adjustment capabilities, as well as rear camber and toe arms. To show just how easy it is to install these parts three members of the STILLEN marketing team decided to tackle the job on a Saturday in one of their driveways. Josh Biggers (vehicle owner), Mike Ullrich (house/garage owner) and Kyle Millen were able to install everything and make adjustments to the sway bar within 4 hours using regular floor jacks and hand tools. Also, stopping regularly to document the process with photography.

We hope that this little article encourages you to try this type of installation for yourself. Working on your own car can be fun and rewarding, as well as save you money. Having G35 performance parts will enhance your driving experience. Also, you will have a better understanding of exactly what your car is doing while your driving. Suspension is a very important part of the car and if the modifications are not performed properly the results can be dangerous. If you feel that any of this is beyond your capabilities we strongly recommend that you leave this up to a professional.

Throughout this article you will see bright red STILLEN adjustable sway bars. Josh had installed the sway bars prior to the components we were adding on this day. We will go into a little more detail on sway bar settings later.

Step-by-Step Installing the STILLEN G35 Coupe Rear Camber Arms & Toe Arms

Step 1: Getting Started

With the rear wheels removed we were able to get a good idea of where to start. It really does not matter if you change the front or rear suspension components first when doing the complete kit. We just started in the rear because we knew that would take the longest. We figured we would knock it out first.
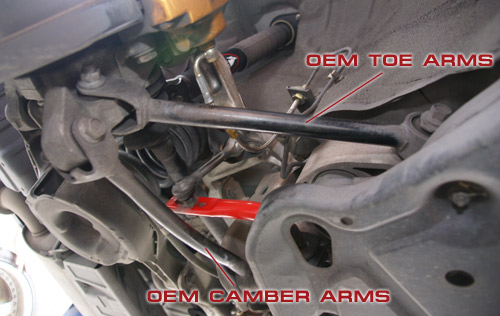
OEM G35 Camber Arm & Toe Arm

OEM G35 Camber Arm & Toe Arm

Step 2: Loosen Underbody Panels & Sway Bar Mounts

To aid in removal of the rear camber and toe arms you will need to loosen some of the underbody panels as well as the sway bar mounts. This only takes a few minutes and makes the installation MUCH easier.
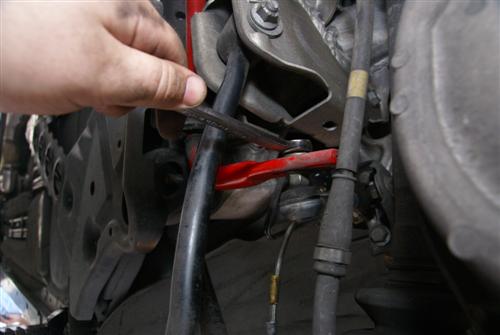
Loosening the Underbody Panels & Sway Bar Mounts
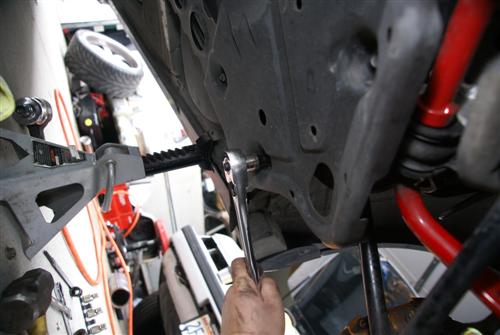
Loosening the Underbody Panels & Sway Bar Mounts
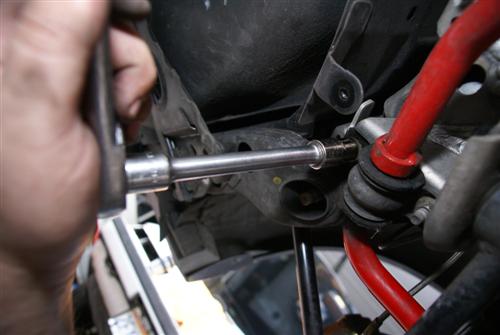
Loosening the Underbody Panels & Sway Bar Mounts

Loosening the Underbody Panels & Sway Bar Mounts

Loosening the Underbody Panels & Sway Bar Mounts

Loosening the Underbody Panels & Sway Bar Mounts

Step 3: Remove the Rear Links & Mark Your Current Camber Eccentric Cams

Once you have all of the surrounding obstructions out of the way you are ready to begin removing the rear links. We recommend marking your current camber eccentric cams so that you have some type of reference when you install your new camber arms. Keep in mind that the factory hardware will be re-used so you will want to make sure that you keep track of it and make sure it is out of danger.
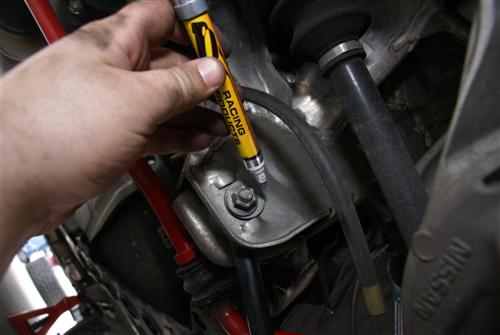
Marking the Current Camber Eccentric Cam Locations

Marking the Current Camber Eccentric Cam Locations

Step 4: Remove the Factory Camber Arms

At this point you can begin removing the factory camber arms. You will want to keep the factory toe arms on the car to support the rear suspension.
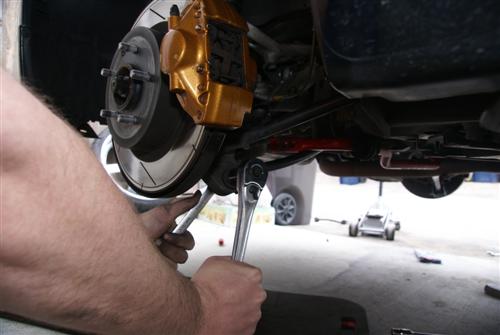
Removing the Factory Camber Arms

Removing the Factory Camber Arms

Step 5: Remove the Rear Toe Arms

Once you have the rear camber arm removed you can begin removing the rear toe arms. The toe arm bolts go through the chassis and connect to a threaded nut already installed on the backside of the chassis. You will not need to worry about putting a wrench on that nut as the chassis is designed to prevent it from rotating. Simply remove the bolt and pull the toe rod out.
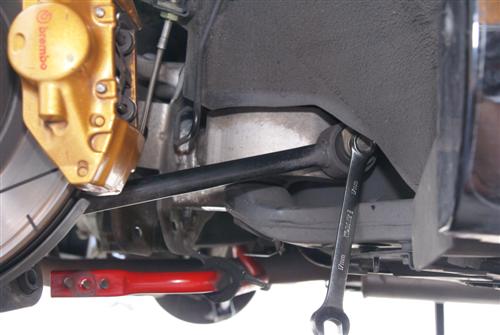
Removing the Rear Toe Arms

Removing the Rear Toe Arms

Step 6: Align Mounting Holes

One you have the factory components out of the car we recommend lining them up side by side. Try to align the mounting holes on your STILLEN arms in the same position as factory. This way your car will be similar to the way it was before you began the work. This little bit of time spent aligning these holes will make your re-alignment MUCH easier.
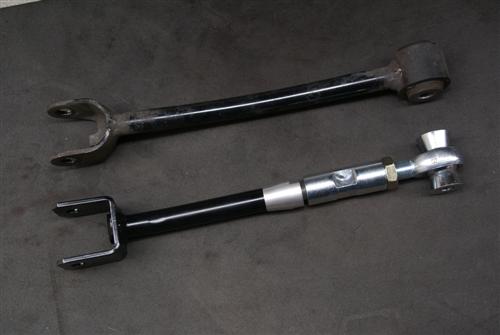
Aligning the Mounting Holes
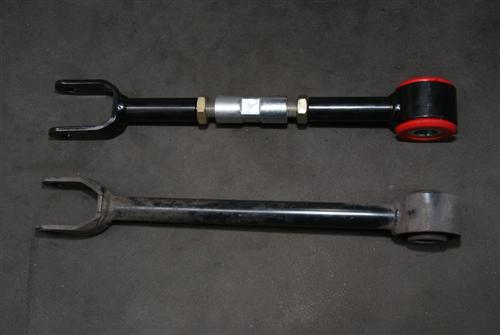
Aligning the Mounting Holes

Aligning the Mounting Holes

Aligning the Mounting Holes

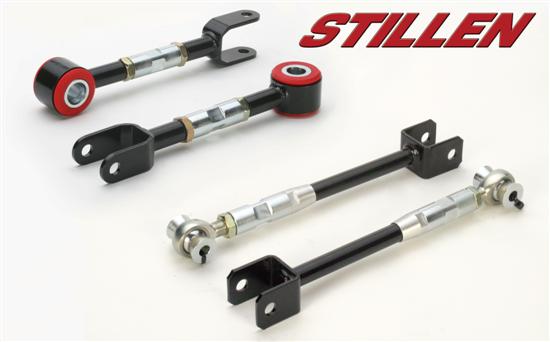
With the factory and STILLEN camber arms side by side you can clearly see the major improvements in construction as well as alignment capabilities. Utilizing laser cut mounting clevis’ precision welded to CNC machined steel connecting rods and finished off with heim joints and high mis-alignment spacers these camber and toe arms offer incredible strength and a wide range of adjustment. Also, on the toe arms we use a higher quality, poly urethane bushing to replace the O.E. rubber bushings.

Step 7: Install New STILLEN Suspension Components

Now you can begin installing your new STILLEN suspension components. Our recommendation is to start with the chassis mounts first and then move to the spindles. These mounting points will not move and it is much easier to start with them mounted to the fixed locations first. Also, we recommend starting with the toe arms first, then installing the new camber arms second. Because of the location of these parts it is much easier to start with the toe arms then do the camber arms after.
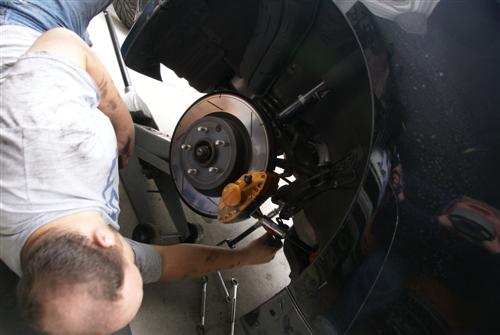
Installing the New STILLEN Suspension Parts

Installing the New STILLEN Suspension Parts

Step 8: Check Your Witness Line

Once you have finished installing your camber arms you will want to make sure that your witness line on the eccentric camber adjusters is in the same location as factory. Again, this is to help with the re-alignment. Now you are ready to re-attach all of your sway bar mounts and factory under trays. Also, we recommend going around and doing a “nut and bolt check” making sure that all of your hardware is secure.

Step 9: Get Your Alignment Done

At this point you are ready to get an alignment done on your car. Let your technician know that you have aftermarket suspension components installed on your car to allow the car to be properly aligned. With these components installed you will be able to achieve any desired suspension settings.
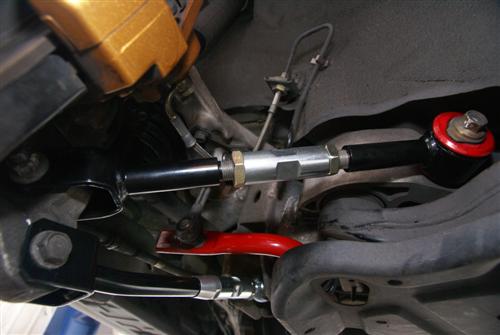
G35 Coupe With STILLEN Rear Camber Arms & Toe Arms

G35 Coupe With STILLEN Rear Camber Arms & Toe Arms
Well after long last, here is the in-car footage of a couple of stages from the 2008 Dunlop Targa Rally in New Zealand.  Special thanks to Streetfire.net for providing the camera equipment.

STILLEN Ford GT Targa Rally New Zealand 2008

These videos are both from Day 1 (of 6 days) of the rally, and are full stages, giving you some of what it’s like to be part of such a neat event such as this.

Kyle Millen’s Introductions

“This was one of the longest stages of the rally.  It offered very diverse conditions.  Some spots were tight and twisty, others were wide open and fast, and a few spots were like hill climbs.  We caught four cars in this stage and we ended up beating the eventual race winner by over 30 seconds through this stage.”

“This stage was pretty tricky.  It was mostly wet and pretty treacherous.  You can see where a few cars went off.  It wouldn’t have been to go off the road in these stages as some of the drop offs were pretty tall.  This stage was run through mainly mountain roads….It was a BLAST!!!”

Streetfire.net also came down to the STILLEN compound and got a chance to sit down with Steve and Kyle after the event to discuss the rally and plans for the 2009 Targa Rally.

Subscribe to the blog as we prepare our Nissan GT-R for Targa Newfoundland this year.  A complete build is in order, and AWD on tap.. look for even more excitement.  We encourage you to follow along through this build and Targa event.

Other 2008 Targa New Zealand Coverage, Pictures, Daily Posts – Click Here

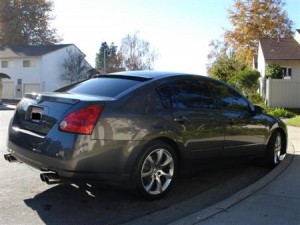
We recently introduced the STILLEN Roof Wing for the 04-06 Nissan Maxima (Part# 108264), and wanted to showcase it on a customer vehicle, and Maxima.org member Fastmax05 was up for the challenge.

As you can see the STILLEN Maxima Roof Wing adds a unique, finishing touch to the lines of the 6th generation Maxima, and is a very easy install.

STILLEN Roof Wings are constructed of high quality, durable urethane, and feature a lifetime warranty, and are secured to the rear glass with 3M™ Acrylic Foam Tape pre-installed to the wing for ease of installation.

Justin’s (Fastmax05) 2005 Maxima SE has a myriad of modifications he’s made, and is a great example of a really clean 6th Gen Max.  Some photos and a detailed modification list is below.  Thanks Justin for the pictures!

Modifications:

Engine

  • Fujita CAI Wrinkle Black Finish
  • MagnaFlow Mufflers
  • Cattman B-Pipe
  • Cattman Y-Pipe
  • NWP Spacer Kit
  • NWP VIAS Block Off Plate
  • SSIM Port
  • Cosmo Racing UDP
  • Timing Advance 17*
  • Grounding Kit

Exterior

  • Infiniti G35 Coupe 18inch Wheels
  • 255/40/18 Michelin PS2 Tires
  • EzKoncepts Carbon Fiber Hood
  • Ionic Dynamics Carbon Fiber Engine Cover
  • JDM Ebay Grill Painted High gloss Black
  • STILLEN Front Lip *Pending*
  • STILLEN Roof Spoiler
  • Painted Engine Bay Pieces K11 / Smoke Color
  • Fujita Oil Cap
  • Tinted Taillights
  • Limo Tint
  • Rear Deck Lip Spoiler
  • Painted Chrome Roof Strips
  • Hyper White License Plate LED’s
  • PIAA H3 Fog Bulbs
  • LED Turn Signal Switchbacks
  • ParadoxSystems Eye lids Painted K11 / Smoke Color
  • Painted Black Headlight Housing

Suspension / Brakes

  • H&R Springs Front/Rear
  • KYB GR2 Shocks
  • Racingline Tower Brace
  • Racingline Battery Tie Down
  • Roto Pro Rotors
  • E.B.C. Red Stuff Pads

Interior

  • Relocated info Screen
  • Indash Kenwood DVD/CD/Mp3 Touch Screen
  • Pioneer 800Watt Amp
  • Rockford 12in Sub

I am VERY critical of headlights and taillights because it is very rare to a find a set that I would actually consider to be of high quality. I have seen A LOT of cheap and cheesy lights that leak, crack, fog, or just fall apart and I can’t stand that. So, when Anzo came out with these new taillights for the Toyota Tundra I told them that I was going to be very critical and I would not hold back. Long story short…I am VERY impressed with these taillights. Fit and finish is absolutely perfect. The clarity of the lights is very nice. In my opinion, these are more of a safety feature than an aesthetic improvement.

To start with I took some shots of the stock taillights for comparison.

Now to the work itself. The tail lights are pretty straight forward and easy to figure out.

Before you actually remove the light you’ll want to disconnect the wiring harness from the frame rail. These lights come with a complete wiring harness that clips right into the factory connectors. Don’t worry about damaging the little black clip that mounts into the frame. Anzo provides you with a new one, just be careful with the connector ends.

Now you can unbolt the light from the bed rail.

The lights won’t immediately fall out because there are two little pressure clips around the back of the light that need to be unclipped first. To do this just give the lights a firm tug and they’ll come right out. Here is a picture of the clip from the inside (the little white thing).

Once you have the factory wiring harness and tail light out of the way you are ready to install the new Anzo tail light. Go ahead and feed the wiring harness through the openings and install the tail light. I recommend inserting at least one or both bolts to secure it in place. The clips should hold it, but I wouldn’t risk it. Once the light is supported jump back under the truck and plug in the connectors.

Here is a picture of the clip that will hold the wiring to the factory mounting location. I have to admit, it really impresses me that these are included. I did not expect that.

The passenger side taillights are exactly like the driver’s side so I don’t see the need to repeat the step by step instructions. However, I do have some comparison pictures.

Once you have finished up the install this is what it looks like.

Overall I am VERY impressed and happy with these taillights. The installation was very easy and straight forward. The lights are MUCH brighter than standard. I tried to get a comparison shot of their reflection on a white wall inside the shop but it didn’t turn out very well…The flash took over the shot. I have a third brake light ready to install as well. Unfortunately Anzo has two third brake light options (one smooth and one with 4 screws) well, mine mounts with 4 holes and they sent me a smooth one. So, as soon as I can get the new one I will put that on to finish it off. Here is a teaser shot of the third brake light.


Article and photography by Kyle Millen

A few years ago the DOT (Department of Transportation) cracked down on all of the replacement light manufacturers due to their non-compliance.  After that a few companies have risen up and shown themselves to be of superior quality.

Because of the history of poor fitting, sealing, and cracking problems I have seen over the years I was skeptical about the overall performance and quality of aftermarket lights.  Recently we started working with a headlight manufacturer known as Anzo and they were confident that I would be nothing less than impressed.

Anzo USA Logo


We figured we’d put them to the test.

Well, after installing the Anzo’s and driving with them, and trying to flood them with a hose we can say that Anzo lights are phenomonal. We are very impressed with their ease of installation, the perfect fit and finish, and the awesome light they put out. We have no problem recommending these to all of our customers.

Anzo Projector Headlight Installation Article

Anzo Headlights Tundra

Anzo LED Taillight Installation Article

Anzo Taillights Tundra

Look back in the near future for a how-to on installing HID conversion kit into these head lamps.  (Which basically voids the DOT approval but perfect for off-roading…)